
Today
I wanted to show you a project
called
Tranquil Times
Portside Clock

Design
by
Rebecca Trimble

Lets step inside the STUDIO!

My Palette
Antique Green, Antique White, Asphaltum, Avocado, Black Green, Black Plum, Blue Chiffon, Burnt Sienna, Cadmium Yellow, Camel, Cocoa, Driftwood, French Vanilla, Gingerbread, Hauser Medium Green, Light Buttermilk. Neutral Grey, Plantation Pine, Raw Sienna, Rookwood Red, Snow ( Titanium) White, Soft Black, Soft Sage, Williamsburg Blue.


The surface I used is a thick MDF.
The surface is bevel cut so it is actually 2 pieces.
The surface is bevel cut so it is actually 2 pieces.
I had my good friend
Sheila Landry
specially cut the surface for this clock.
Sheila Landry
specially cut the surface for this clock.
You can purchase the surface

I began by first establishing the horizon lines
by base coating in
the
sky and water.

I like to use Ultra Rounds for both base coating and shading.
I build the value by adding several washes of color.
I mop in between each wash.
*** I use separate brushes for my base coating and floating. ***
This insures that the brushes you use to float with maintains a perfect chisel edge!

I keep a separate small bowl of CLEAN water that I use for floating.
If you use the same water that you clean your brushes in to float you you will have a muddy float!

I used a wash of Williamsburg Blue for the water.
I used streaky, short and choppy strokes.
I let the area dry completely.

Next I added the the hills in the background then the hills in the water.

I use Moon and Stain -It brushes to dry brush on the highlights.
Once the hills were painted I added the ship in the background.
I then base coated the cliffs with Cocoa.
I worked wet on wet to slip slap Camel into the Cocoa.
I used French Vanilla to further lighten the edges.
I then shaded the area under where the greenery will be with Asphaltum.

I am now working on the back ground shrubs and trees.

I have started to paint the houses in the back ground.

Continuing to paint the houses in the back ground.
This is a bevel cut surface.
The outer ring is where I will paint the numbers for the clock.

I will now start the lighthouse.

I have finished painting the lighthouse and foliage around it.
Next I will be painting the stone house on the right cliff.

I have finished the stone house and cliff on right.

I am now working on the foreground ship.

I have now mixed a glaze for the outer rim.
To make the GLAZE
I mixed
Antique Green + Asphaltum + Plantation Pine
(3:2:touch)
I then added to this mix
(1:1)


I used a sponge brush to "press and lift"
the
glaze medium
around the outer frame.
It will have a bubbly texture.

While the glaze mixture was still wet
I used a piece of crumpled up plastic wrap
to pounce over the area.

Pouncing with the crumpled plastic wrap gave a nice mottled appearance.
I let the outer frame dry completely before proceeding to paint the numbers.

I am now ready to paint the numbers!

I used a vellum template to transfer the numbers to the outer frame.

I used a liner brush with watered down Lamp Black paint to do the numbers.

Almost done!
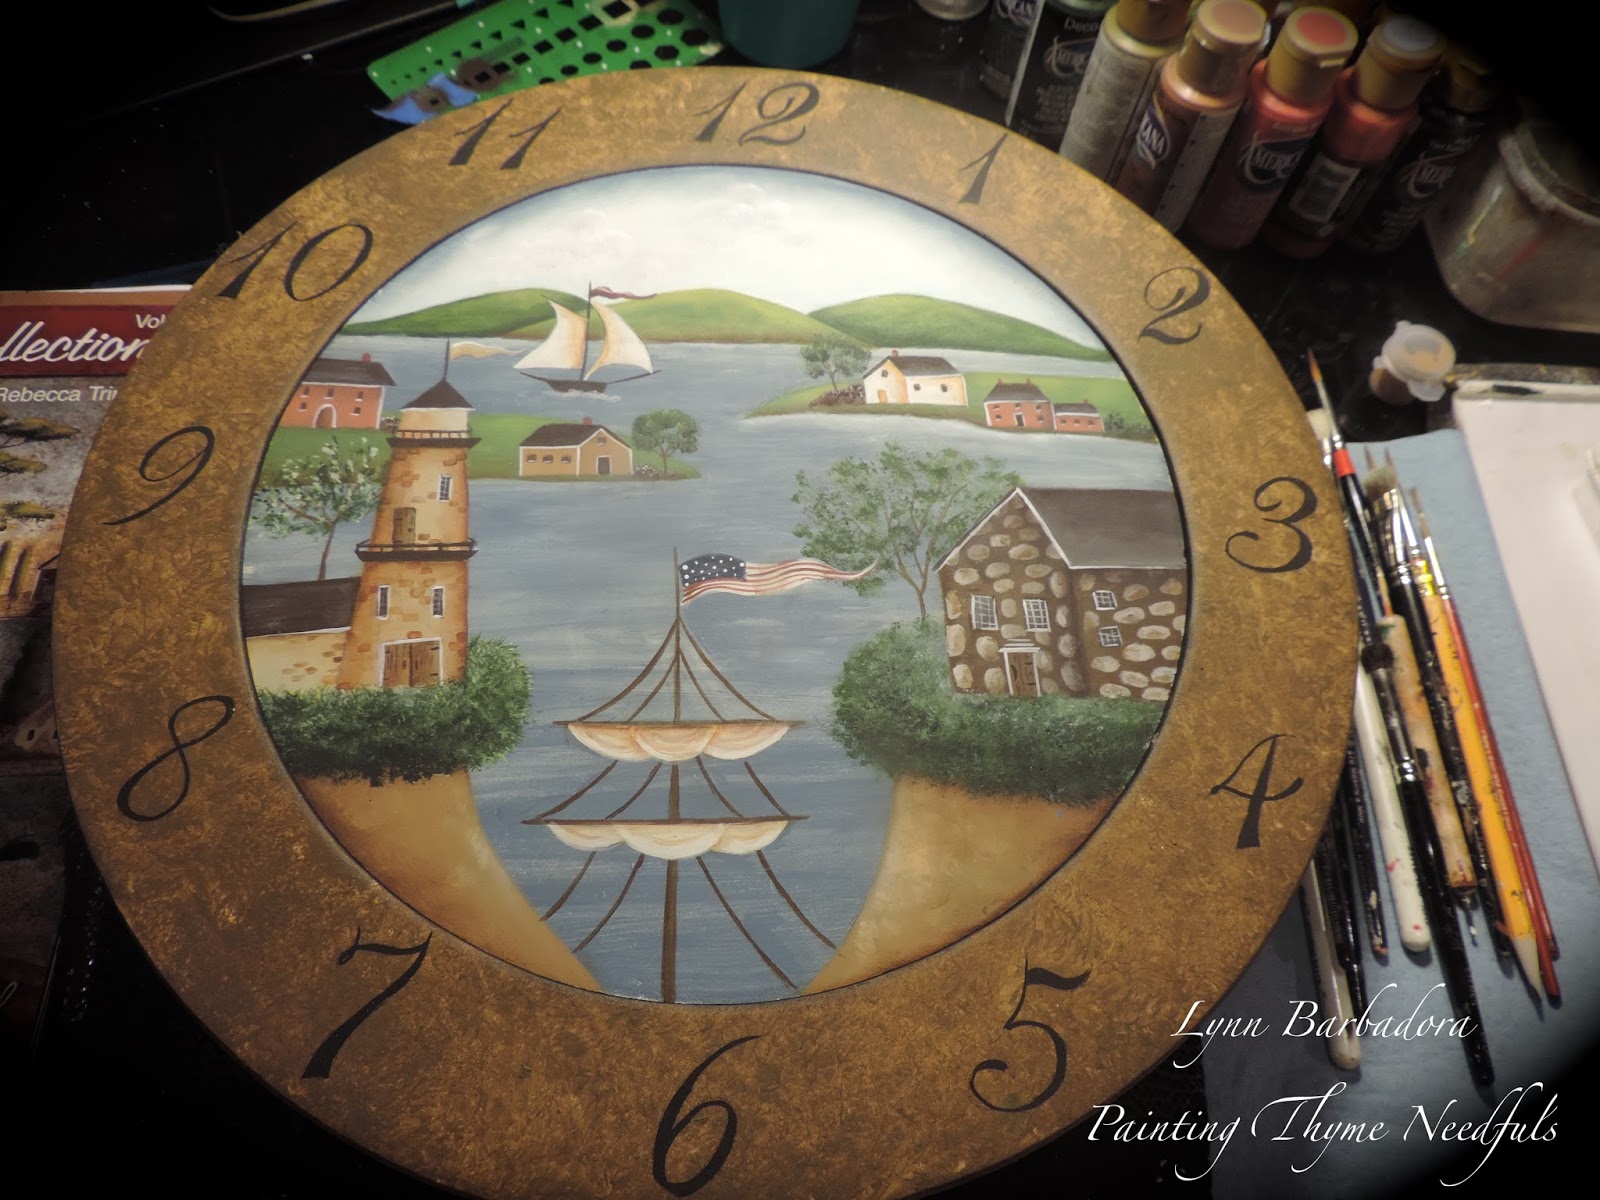
The numbers are complete!

I used several coats
of

I usually apply my first coat of varnish with a large brush.
I ONLY USE this brush for varnish.....nothing else!
I apply additional coats of varnish with a sponge.

I drilled a hole in the center of the clock face for the workings.
It's now THYME to assemble the clock!
Rosemary Reynolds and DecoArt
provided me with the paints to complete this project as part of their
Helping Artist and Blogger Outreach Programs.
THANK YOU!


I hope you have enjoyed watching me paint
this
Portside Clock
Happy Painting!
Lynn


