A view outside my dining room window this morning shows some snow flurries on Cape Cod.
I like to to change the display in my window to reflect the seasons.
The large dummy board that you see is a Cynthia Erekson design called Nicholas Longstocking that I painted years ago. The round box with the legs is a Jane Allen project called Winter Wonderland. The small GLITTER houses were gifted to me by my good friends Jane Allen and Amy Mogish. I made some larger ones inspired by them. My latest obsession is making Wooly Pine Trees. I would like to show you one today!
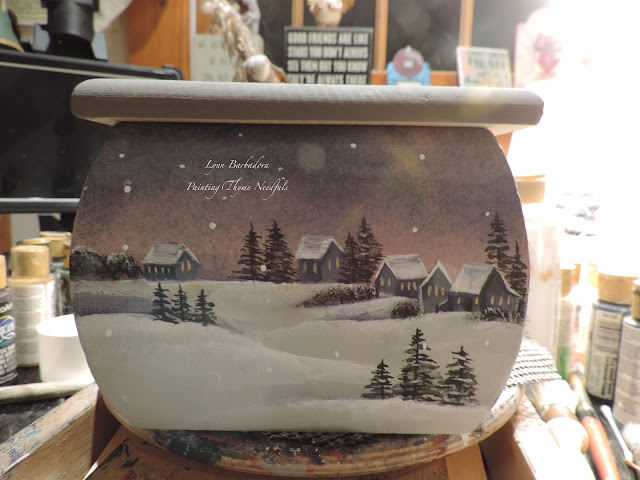
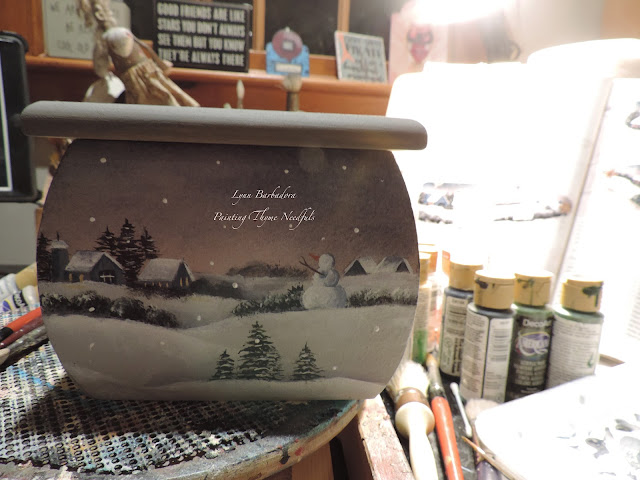
I love when I can repurpose things from my stash to make something new. I had several wood, boxes, wood cubes, dowels and lots of wood handles that I save from my used sponge brushes. I decided to make some wooly pine trees. The one I will show you today is using a box that I had. I painted a design by Debbie Forshey-Choma on it called Snowy Landscapes. I used one of the dowels that I had to make my wooly pine tree.
My Palette
Antique Mauve, Black Green,Burnt Sienna, Camel, Deep Midnight Blue, French Grey Blue, Grey Sky, Light Cinnamon, Snow White
I began by first sanding then sealing my box with DecoArt Multi Purpose Sealer.
When dry I base coated the sides and top of the box with Grey Sky. I applied this as a wash.
I use my dome sash brush to mop and soften my washes.
I added several washes of Deep Midnight Blue to the top portion of the sky area. I mop and dry between each wash.
I use Lynne Andrews Floaters for all my painting. They can hold large amounts of water so you get beautiful floats.
I worked on the sky area first. I transferred the horizon line and the snow hill lines. I loaded my brush with Antique Mauve and did a wide float walking my float UPWARDS to tint into the sky area. I deepened the color of the sky by floating Deep Midnight Blue around the top off the box. I did a wide shade of the Deep Midnight Blue walking the float DOWN towards the horizon line. I mopped to soften.
I float shaded behind each snow hill using Deep Midnight Blue. I then used Snow White to float a wide highlight along the front side of each hill. I used my mop top soften. I added a final highlight of Snow White to the top of each snow hill.
Once the sky and snow hills were established I transferred the remaining design...the houses and trees to each side of the box.
I use a graph ruler to aid me in transferring straight lines!
I also use a graph ruler and pencil to transfer a center line for each pine tree.
I finished my piece with several coats of varnish. DecoArt makes several that I like. I used the Ultra Matte for this project.
I used a stencil I had for the top of my box.
So pretty!
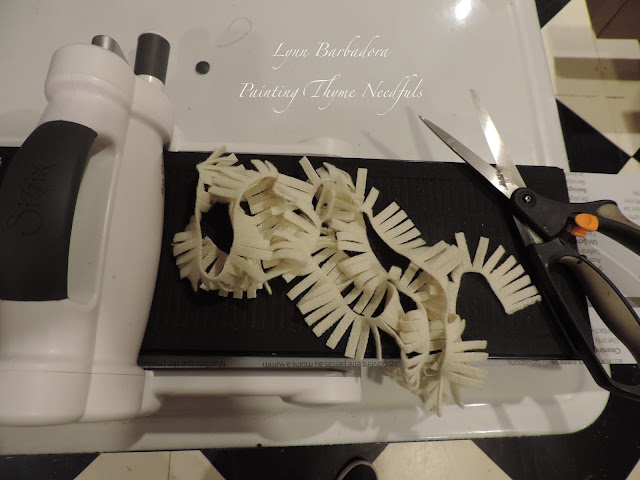
Let's make a wooly pine tree! I purchased a BIG Shot Die Cutter along with a die to cut the wool fringe for my trees.
You do not need a die cutter! You can fringe your wool by hand as well!! I have made tree both ways!
You will need a pair of Fiskar Scissors like this if you are going to fringe by hand.
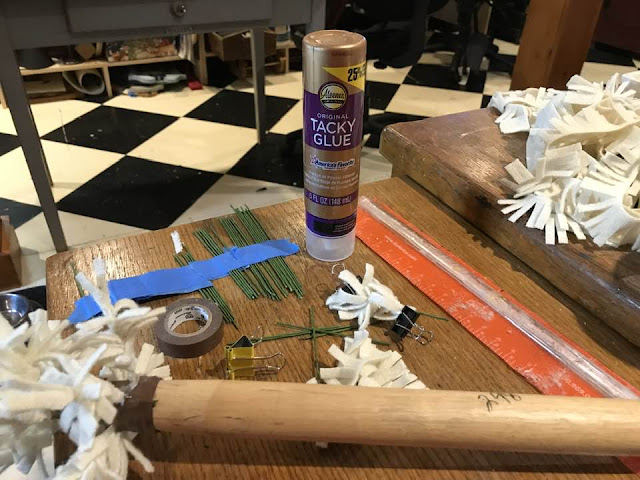
I begin by cutting all my wire for the branches first. I tape each row together to stay organized.
Each branched is individually wrapped with fringe.
I glue as I go along. I start at the TOP of the tree glueing my branches row by row to the bottom of the tree. I use brown electrical tape to reinforce each branch to the center dowel. When all the branches have been secured I then rip a strip of brown cotton fabric and starting at the top I wind the fabric around the center dowel, gluing as I go along to cover the brown tape. It gives a nice finished appearance.
My husband attached my finished tree to the box cover.
I love adding vintage mercury glass ornaments to my trees.
The center dowel was an old baluster from a staircase.
Here is my completed Snowy Landscape Wooly Pine Tree.
This tree measures about 25" tall.
I hope you have enjoyed watching me make a Wooly Pine Tree!
Always paint with a happy heart!
Lynn


.jpg)


.jpeg)


