Sunday, January 15, 2023

Time to show you Snowy Landscapes.


A view outside my dining room window this morning shows some snow flurries on Cape Cod.


I like to to change the display in my window to reflect the seasons. 

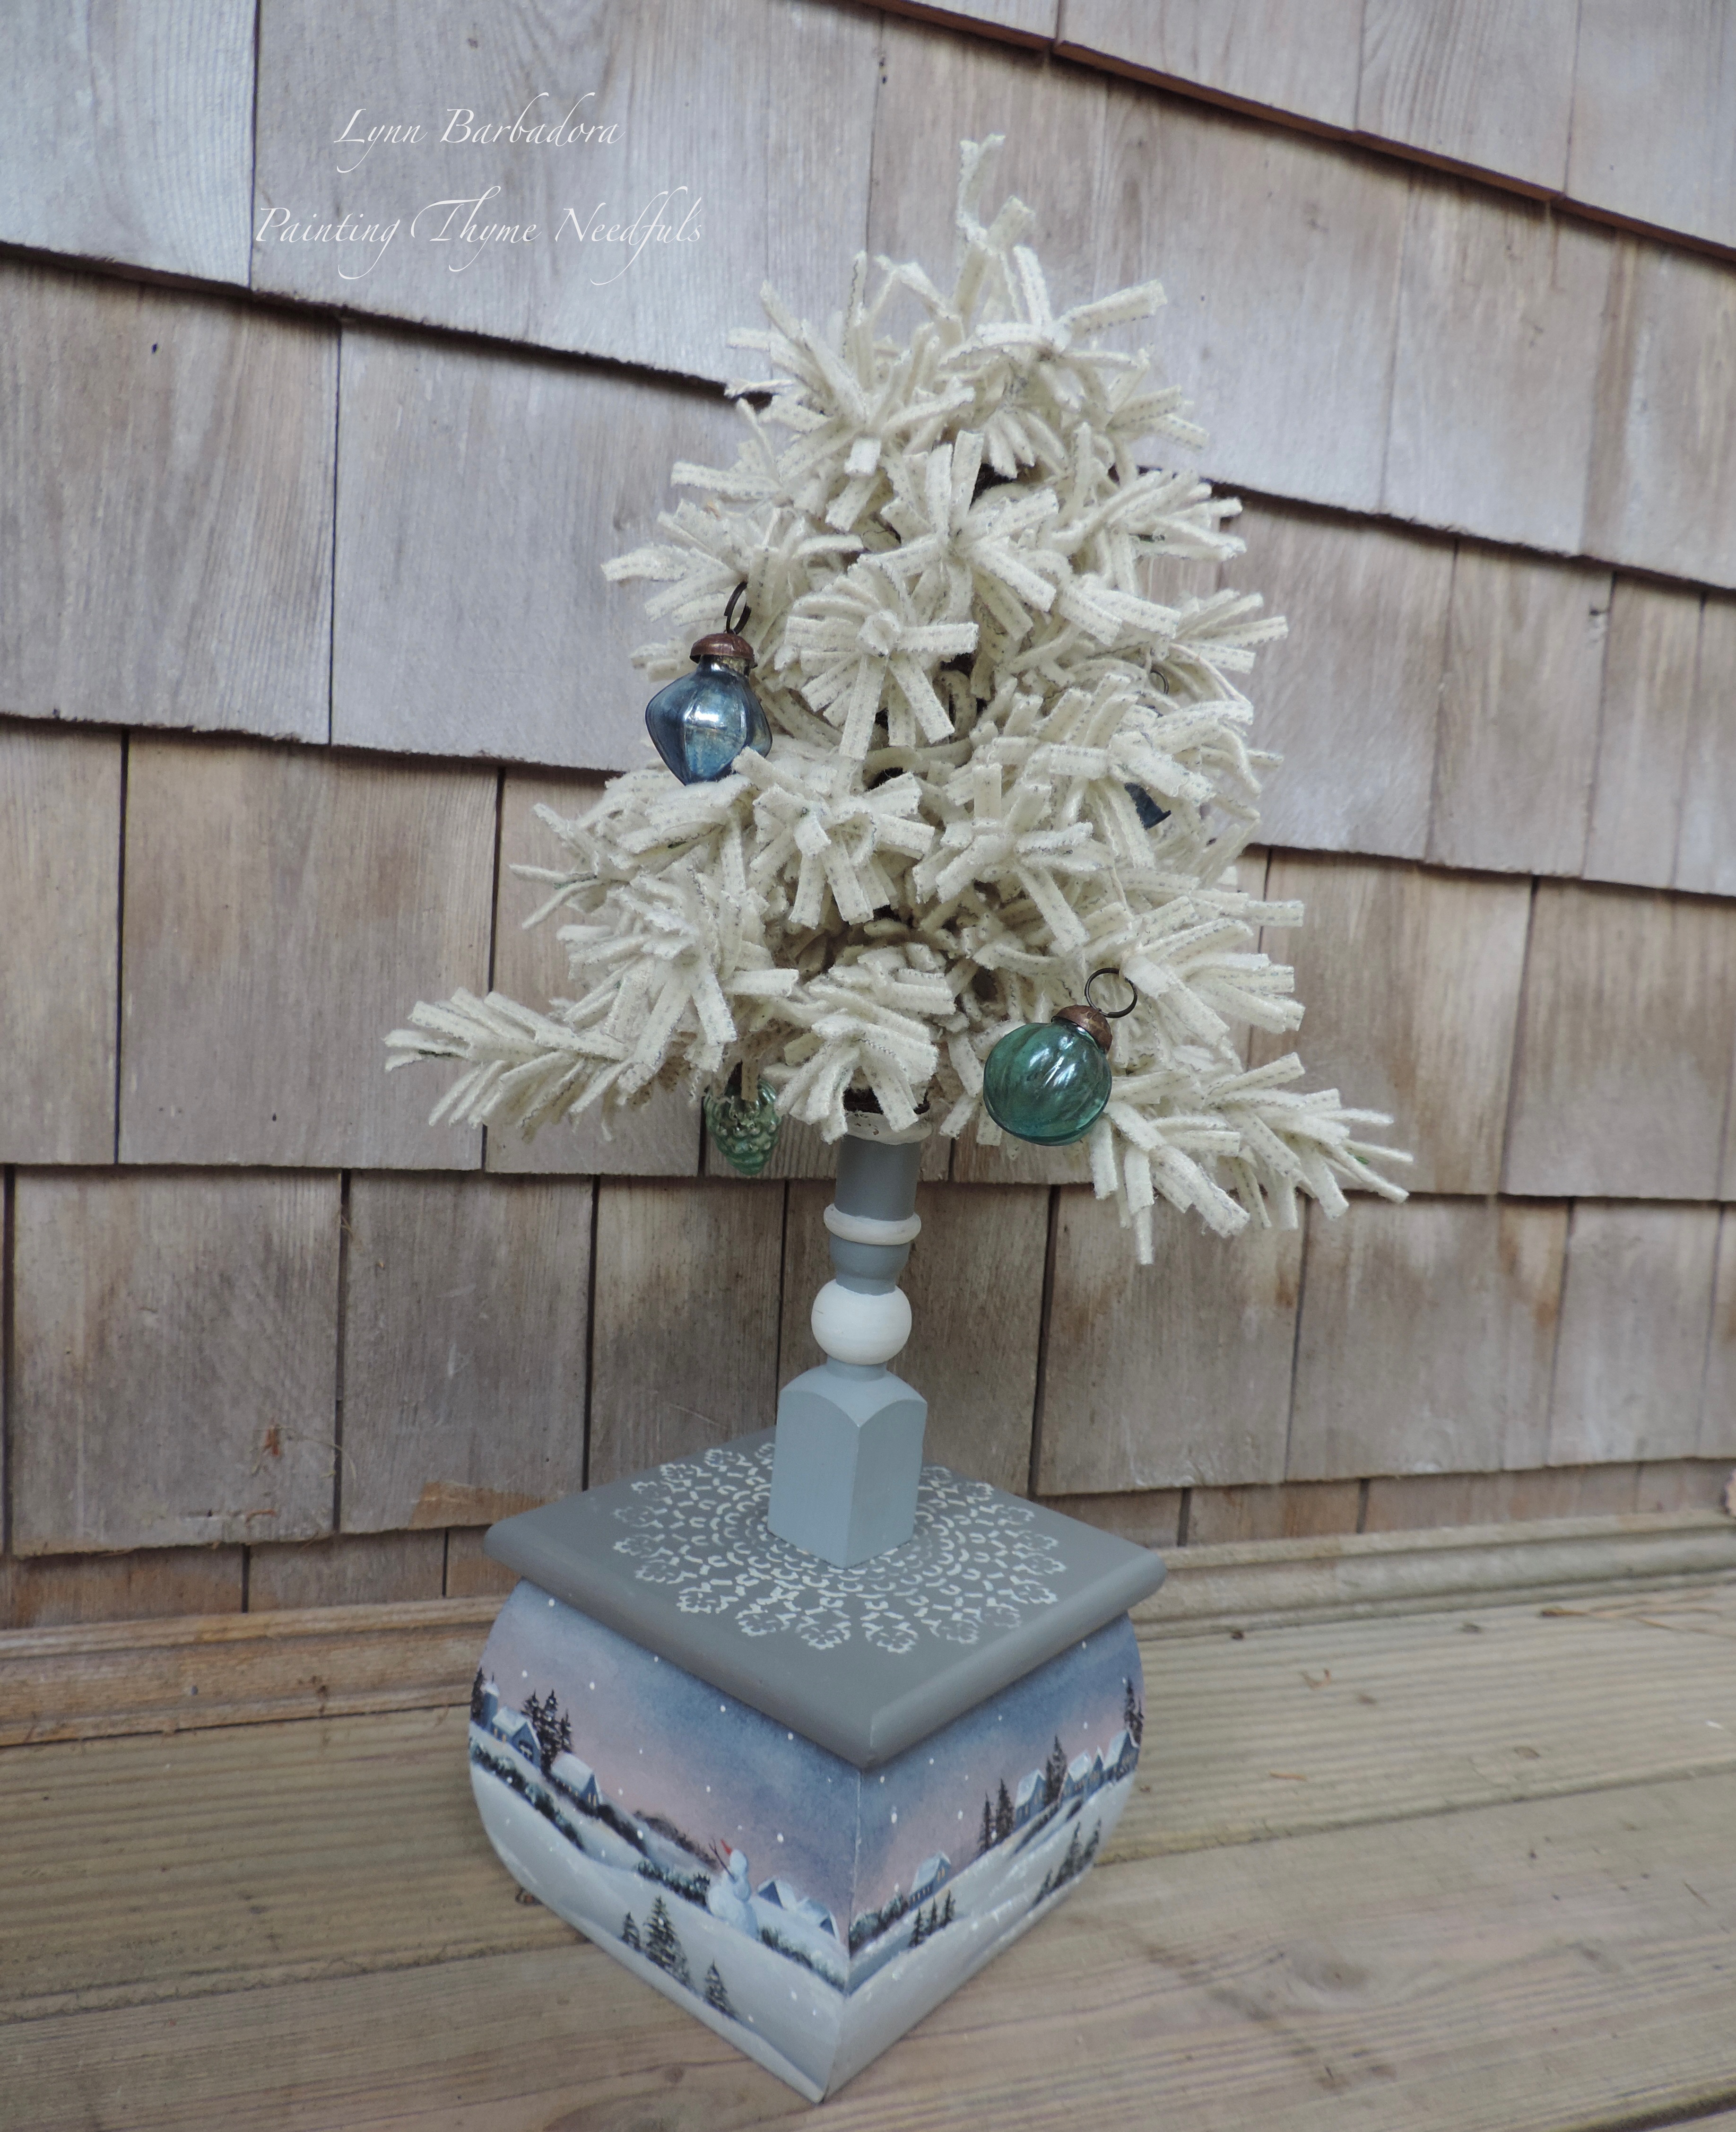
The large dummy board that you see is a Cynthia Erekson design called Nicholas Longstocking that I painted years ago. The round box with the legs is a Jane Allen project called Winter Wonderland. The small GLITTER houses were gifted to me by my good friends Jane Allen and Amy Mogish. I made some larger ones inspired by them. My latest obsession is making Wooly Pine Trees. I would like to show you one today!


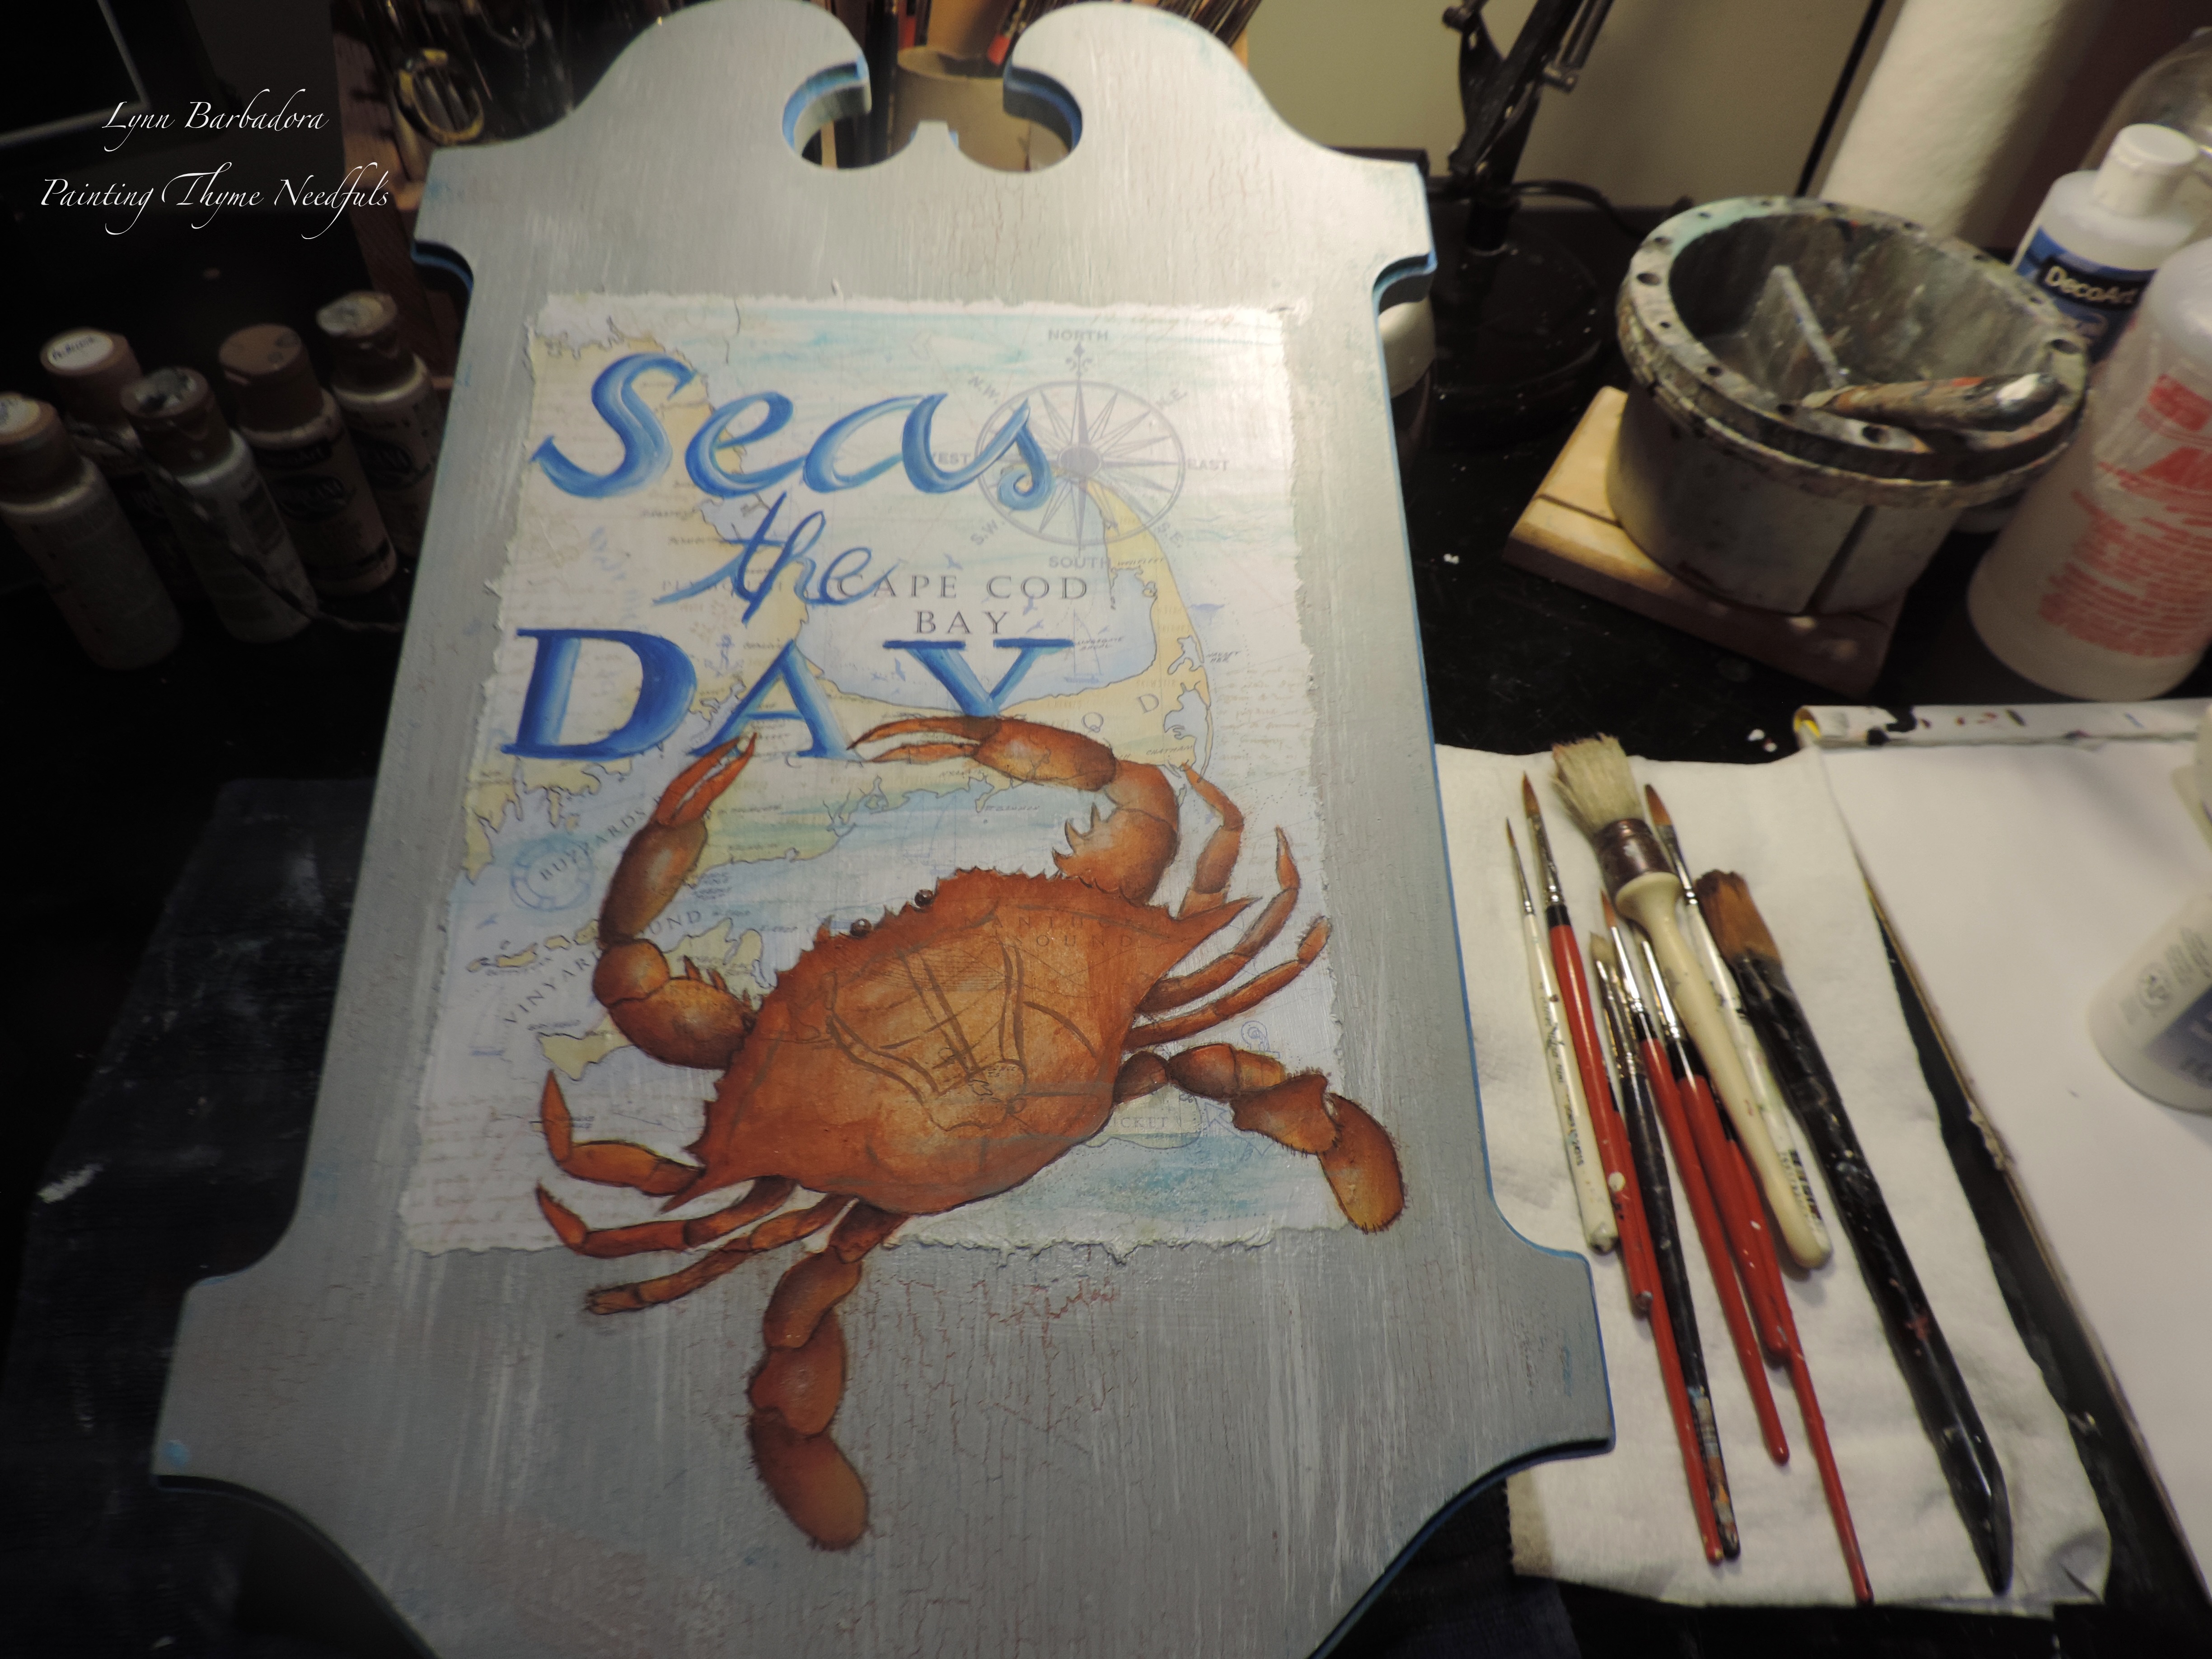
I love when I can repurpose things from my stash to make something new. I had several wood, boxes, wood cubes, dowels and lots of wood handles that I save from my used sponge brushes. I decided to make some wooly pine trees. The one I will show you today is using a box that I had.  I painted a design by Debbie Forshey-Choma on it called Snowy Landscapes. I used one of the dowels that I had to make my wooly pine tree.


My Palette

Antique Mauve, Black Green,Burnt Sienna, Camel, Deep Midnight Blue, French Grey Blue, Grey Sky, Light Cinnamon, Snow White


I began by first sanding then sealing my box with DecoArt Multi Purpose Sealer.


When dry I base coated the sides and top of the box with Grey Sky. I applied this as a wash.
I use my dome sash brush to mop and soften my washes. 
I added several washes of Deep Midnight Blue to the top portion of the sky area. I mop and dry between each wash.


I use Lynne Andrews Floaters for all my painting. They can hold large amounts of water so you get beautiful floats. 


I worked on the sky area first. I transferred the horizon line and the snow hill lines. I loaded my brush with Antique Mauve and did a wide float walking my float UPWARDS to tint into the sky area. I deepened the color of the sky by floating Deep Midnight Blue around the top off the box. I did a wide shade of the Deep Midnight Blue walking the float DOWN towards the horizon line. I mopped to soften. 


I float shaded behind each snow hill using Deep Midnight Blue. I then used Snow White to float a wide highlight along the front side of each hill. I used my mop top soften. I added a final highlight of Snow White to the top of each snow hill.


Once the sky and snow hills were established I transferred the remaining design...the houses and trees to each side of the box. 


I use a graph ruler to aid me in transferring straight lines!


I also use a graph ruler and pencil to transfer a center line for each pine tree. 


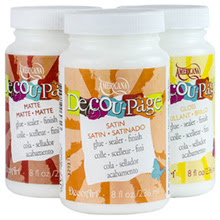
I finished my piece with several coats of varnish. DecoArt makes several that I like. I used the Ultra Matte for this project. 


Once my piece was completely dry I added DecoArt CRYSTAL Glamour Dust to the snow hills. 


I used a stencil I had for the top of my box.


So pretty!


Let's make a wooly pine tree! I purchased a BIG Shot Die Cutter along with a die to cut the wool fringe for my trees.


You do not need a die cutter!  You can fringe your wool by hand as well!! I have made tree both ways!


You will need a pair of Fiskar Scissors like this if you are going to fringe by hand. 


I begin by cutting all my wire for the branches first. I tape each row together to stay organized.


Each branched is individually wrapped with fringe. 


I glue as I go along.  I start at the TOP of the tree glueing my branches row by row to the bottom of the tree. I use brown electrical tape to reinforce each branch to the center dowel. When all the branches have been secured I then rip a strip of brown cotton fabric and starting at the top I wind the fabric around the center dowel, gluing as I go along to cover the brown tape. It gives a nice finished appearance. 


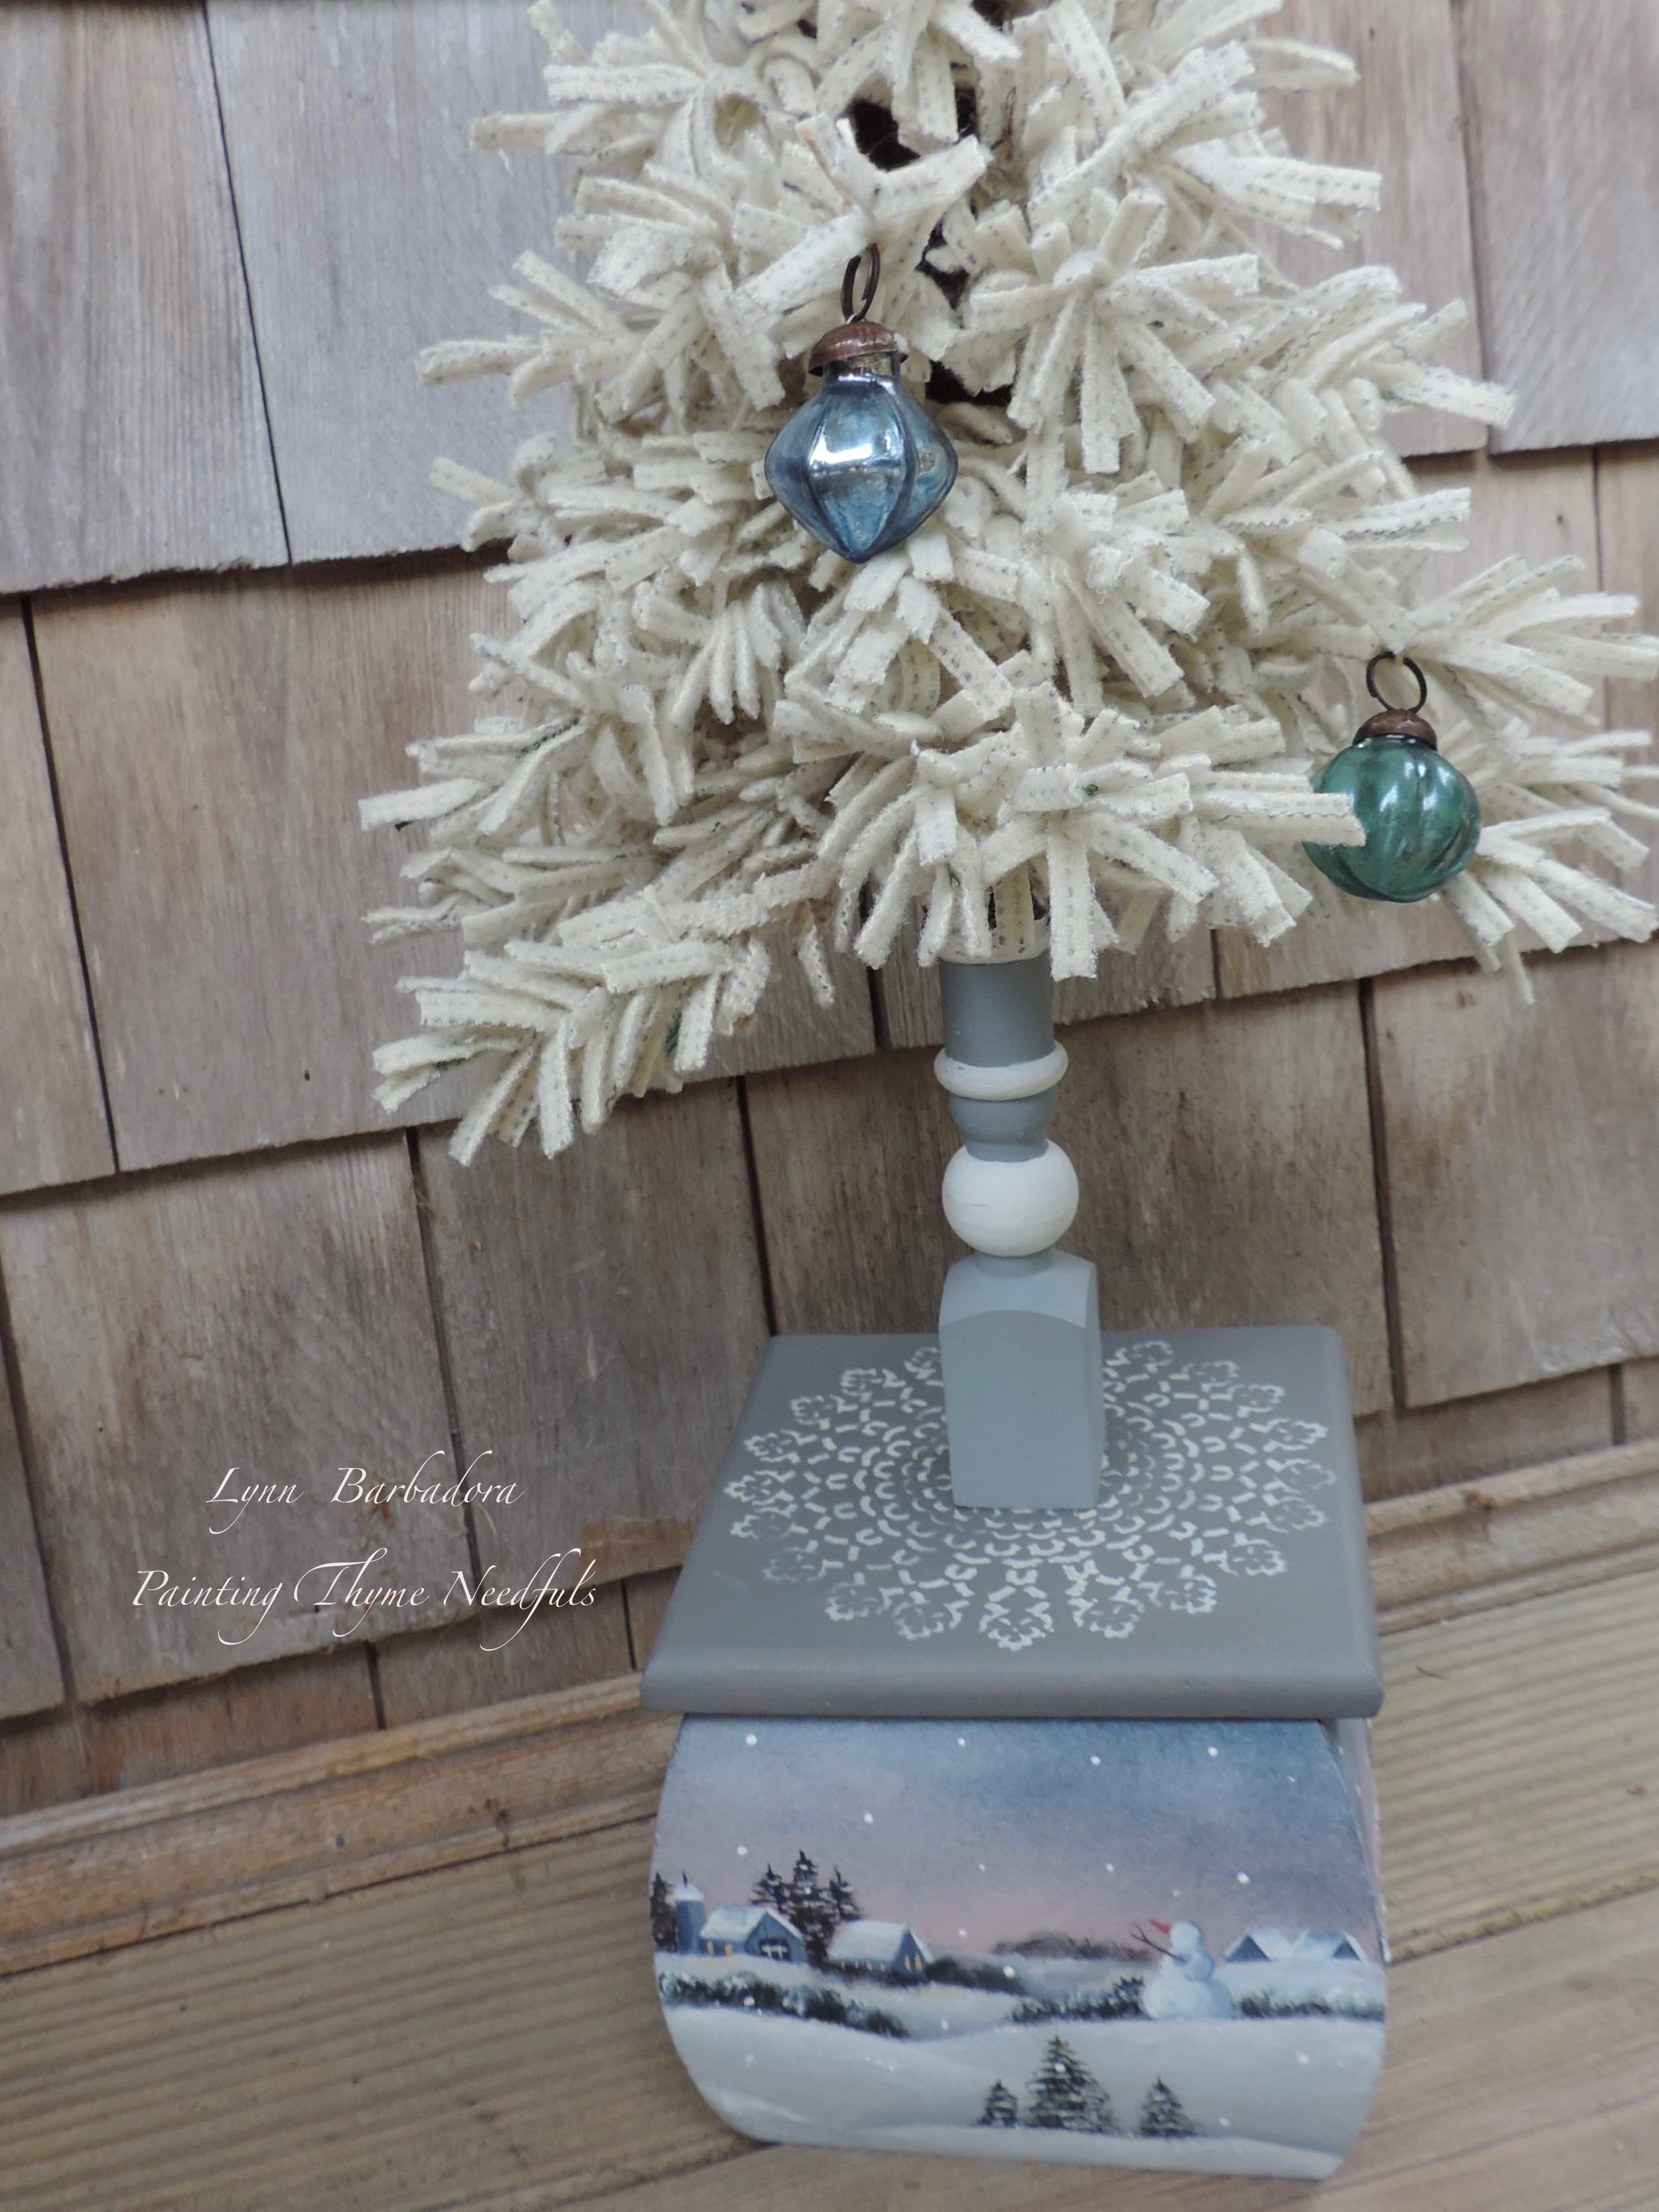
My husband attached my finished tree to the box cover. 
I love adding vintage mercury glass ornaments to my trees. 


The center dowel was an old baluster from a staircase. 


Here is my completed Snowy Landscape Wooly Pine Tree. 
This tree measures about 25" tall. 


I hope you have enjoyed watching me make a Wooly Pine Tree!

Always paint with a happy heart!
Lynn


Wednesday, August 10, 2022

Thyme to SEAS the Day!

 I have always loved doing trash to treasure projects. 

                        I have had a sign board in my stash for quite sometime now waiting for the perfect project. 

Today you can SEAS the Day

 and 

watch me create a fun mixed media signboard using a variety of materials and techniques

 -Decoupage, faux crackle finish and decorative painting!


SEAS the Day
 is a design 
by 
Laure Paillex


Palette

DecoArt Americana Acrylics


Snow White, Gray Sky, Persimmon, Turquoise Blue, True Blue or Clear Blue, Mustard Seed, zczocoa, Burnt Sienna, Soft Black, Acrylic Medium Extender


Let's Paint!


The base coat for this piece is Turquoise Blue. 
I did 2 coats of Turquoise Blue.


When the final coat of Turquoise Blue was dry I brushed irregular patches of Persimmon on the sign board using a chip brush.  
Using this scruffy brush I applied a liberal amount of paint in patches over the sign board, 
thus creating a rich contrast between the 2 complimentary colors. 
I let the paint dry completely.


Next I applied a coat of 
Weathered Wood Crackle Medium
Let this dry completely.


When dry I applied a heavy topcoat of Gray Sky.
As you the surface began to crackle you could see the original base coats of Blue Turquoise and Persimmon showing.


Next I prepared my map for the surface. 
 
IMPORTANT NOTE. 
If you print from a high quality laser printer the print is color fast and safe to use "as is."
However if you are printing the map from a home printer test the ink for color-fastness
Jet inks must be sealed with several coats of Acrylic Matte Spray to prevent bleeding. Laser ( dry toner) prints are color fast and can be used "as is."
  

I recommend Krylon Workable Fixatif to prevent bleeding of prints .


You can use scissors to trim your map to fit your surface
 or you can tear away the edge for a more rustic appearance.
 I first dampened the edge of the paper using my brush and a little water. 
You can then easily tear away the edge using a ruler. 


I used a wide
  Americana Decor Brush


to quickly apply
  Decou-Page Matte Medium


first to the surface ( signboard)
and
 then to the back of the map. 
I carefully laid my map print down onto the board (wet sides together) 
and 
adjusted as necessary.

*** Handle carefully so as not to tear the print.***


I began by smoothing out the air bubbles from the center outward towards the edges using my hand. 
Continue to smooth out using a plastic scraper or even a credit card. 


As I final step I used my rubber brayer to fully seal the paper to the surface. 
I let the piece dry completely over night!

I then mixed some DecoArt Matte Medium with a small amount of Snow White.
I used just enough to make a "milky haze"and brushed it over the map. 
This softens the background, seals and protects the print.
I then allowed this to dry completely before proceeding to the next step.


I resized the line drawings to fit my surface. 
I transferred the design to my surface.


Developing the Lettering

The letters are base coated with Turquoise Blue thinned with water to a semi-opaque wash.
The letters are then float shaded with a mixture of Blue Turquoise + True Blue. ( 1:1)
I highlighted the center using a mixture of Snow White + a touch of Blue Turquoise. 
A final highlight of straight Snow White is streaked in the center of each letter. 
I then outlined each letter along the left and bottom edges using a liner brush 
and 
True Blue + Soft Black. (1:1)


I use Silver Micron Mini lettering brushes which come in a variety of sizes.


Next I painted the crab.
I painted MANY thin washes of color to achieve my end result!
Be Patient!


Notice that the crab appears to be grasping the letter
A in Day.


My completed project.

Thank you DecoArt for providing the paints to compete this project!


"Cape Cod crabs roam o'er the sands; their beds are made of seaweed strands"

Always paint with a Happy Heart!

Lynn


Related Posts Plugin for WordPress, Blogger...